Have you ever seen this snippet of css and wondered what it did?
.clearfix:before, .clearfix:after {
  content: " ";
  display: table;
}

.clearfix:after {
  clear: both;
}
.clearfix is used on an element to correct the behavior of its child elements that have been floated. It’s commonly used when developers want to stack floats horizontally or when they wish to avoid collapsing the parent element. .clearfix involves three main things: float, clear, and display: table.
Floats: The Good, the Bad, and the Ugly
The float property is a positioning tool that allows other elements to flow around the floated element. Its roots are buried deep in print design, where text was known to flow around floated images.

It’s common to see entire layouts made up of floats, because floating elements offers a lot of versatility despite the intent of its creation.
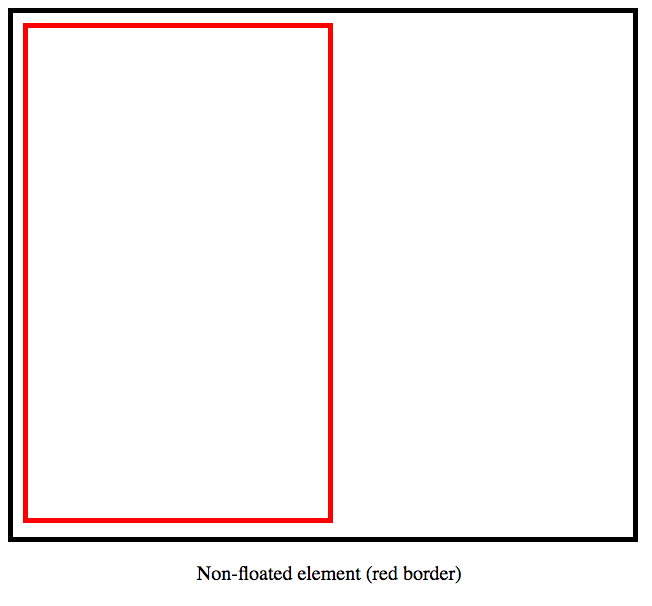
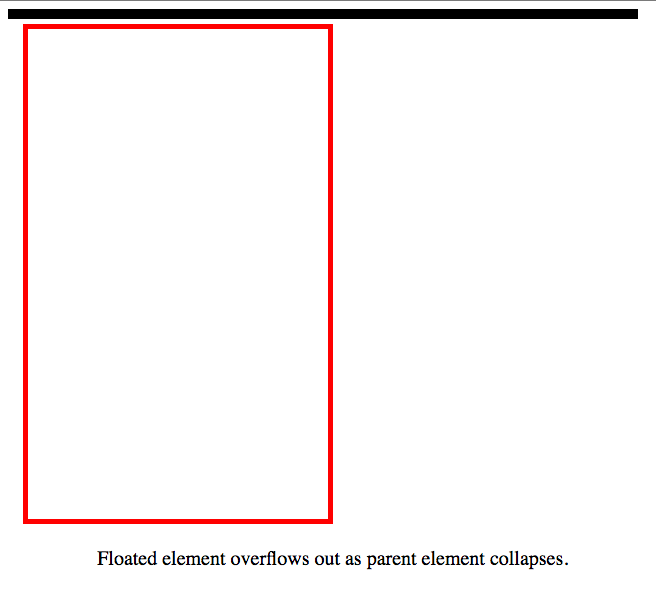
Floats can cause unseen trouble, though. If a floated element is taller than the element containing it, it will overflow outside of its container.
Parent containers can also collapse on floated children. Parent divs generate a height that is equal to the content it contains. A floated element does not contribute to this height, thus giving the parent a height of 0, as seen in the example above.
Enter the clear property
The clear property is used to control the position of floated elements.
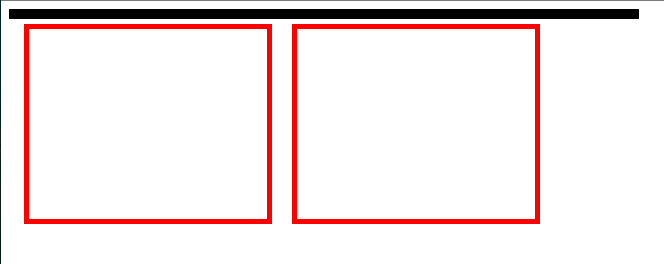
No elements have been cleared and floated elements overflow out of container because it has collapsed.

The clear: left property is given to the second float, stacking everything horizontally. However the parent div stays collapsed because there aren’t any non-floated children elements within it.
Enter display: table
The last ingredient of .clearfix is display: table. It’s similar to display: block in this scenario in that it defines a block-level box. Its sole purpose is to provide a block-level ‘buffer’ between the floated elements and the parent container so that the parent container can grow to its proper height.
Putting it all together
Let’s take a look at .clearfix again:
.clearfix:before, .clearfix:after {
  content: " ";
  display: table;
}

.clearfix:after {
  clear: both;
}
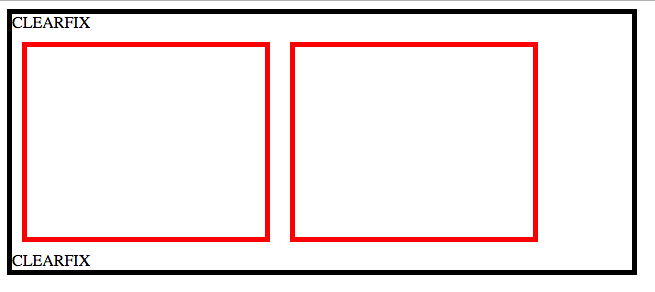
The parent container is finally restored to its proper height, thanks to the content property. content: " "; was changed to content: "CLEARFIX" to show you where it’s placed in the parent container. Here is .clearfix with content: " ";.
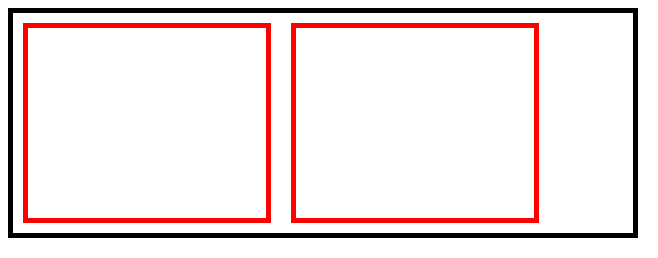
To sum it up:
The first thing .clearfix does is inserts empty content (but still content!) in the form of a block-level element by using display: table :before the floated elements.
Second, it inserts the same thing after the parent element, forcing the parent to generate a height other than 0.
Finally, anything :after the parent element is cleared, pushing the empty content onto a newline.
That’s all there is to it! Now you can go ahead and use it in your own code!